การซิงโครไนซ์ Google Calendar
Synchronize Google Calendar with NightPOS to see and manage meetings from both platforms (updates go in both directions). This integration helps organize schedules, so a meeting is never missed.
ตั้งค่าใน Google
เลือก (หรือสร้าง) โปรเจ็กต์
สร้างโปรเจ็กต์ Google API ใหม่และเปิดใช้งาน Google Calendar API ขั้นแรก ไปที่ คอนโซล Google API และลงชื่อเข้าใช้บัญชี Google
Note
หากเป็นครั้งแรกที่เข้าชมหน้านี้ Google จะแจ้งให้ผู้ใช้ป้อนประเทศและยอมรับข้อกำหนดในการให้บริการ เลือกประเทศจากรายการแบบเลื่อนลงและยอมรับ ToS
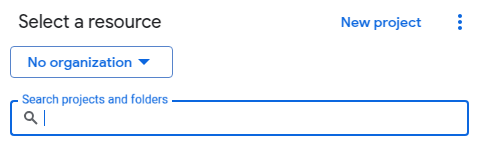
จากนั้นคลิก เลือกโปรเจ็กต์ และเลือก (หรือสร้าง) โปรเจ็กต์ API เพื่อกำหนดค่า OAuth และจัดเก็บข้อมูลประจำตัว คลิก โปรเจ็กต์ใหม่
Give the API project a clear name, like NightPOS Sync, so it can be identified. Then click the
Create button.
เปิดใช้งาน Google calendar API
จากนั้น คลิกที่ Enabled APIs and Services ในเมนูด้านซ้าย เลือก Enabled APIs and Services อีกครั้งหาก แถบค้นหา ไม่ปรากฏ
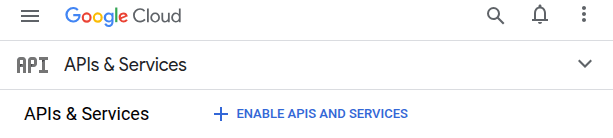
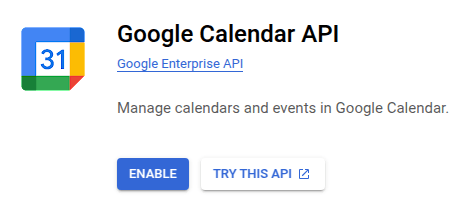
หลังจากนั้น ค้นหา Google Calendar API โดยใช้แถบค้นหาและเลือก Google Calendar API จากผลการค้นหา คลิก เปิดใช้งาน
หน้าจอยินยอม OAuth
เมื่อสร้างโปรเจกต์ API แล้ว ควรกำหนดค่า OAuth โดยคลิกที่ OAuth consent screen ในเมนูด้านซ้าย จากนั้นคลิกปุ่ม เริ่มต้น
Warning
บัญชี Gmail ส่วนตัว อนุญาตให้เป็นประเภทผู้ใช้ ภายนอก เท่านั้น ซึ่งหมายความว่า Google อาจต้องได้รับการอนุมัติหรือต้องเพิ่ม ขอบเขต อย่างไรก็ตาม การใช้บัญชี Google WorkSpace จะอนุญาตให้ใช้ประเภทผู้ใช้ ภายใน ได้
โปรดทราบว่าแม้ว่าการเชื่อมต่อ API จะอยู่ในโหมดการทดสอบ ภายนอก ก็ไม่จำเป็นต้องได้รับการอนุมัติจาก Google ขีดจำกัดผู้ใช้ในโหมดการทดสอบนี้ตั้งไว้ที่ผู้ใช้ 100 คน
ปฏิบัติตามขั้นตอนต่อไปนี้ตามลำดับ:
In App Information, type
NightPOSin the App name field, then enter the email address for the User support email field and click the Next button.ใน Audience เลือก External จากนั้นคลิกปุ่ม ถัดไป
ใน Contact Information ป้อนอีเมลอีกครั้ง จากนั้นคลิกปุ่ม ถัดไป
ใน Finish ทำเครื่องหมายในช่องเพื่อยอมรับ Google API Services: User Policy. สำหรับขั้นตอนสุดท้าย คลิกปุ่ม สร้าง
ผู้ใช้ทดสอบ
เพื่อให้ผู้ใช้สามารถซิงค์กับบัญชี Gmail ส่วนบุคคลได้ พวกเขาจะต้องถูกตั้งเป็นผู้ใช้ทดสอบ ตั้งค่าผู้ใช้ทดสอบโดยไปที่:guilabel:Audience`ในเมนูด้านซ้าย และคลิกปุ่ม:guilabel:`Add users`ในส่วน:guilabel:`Test users ป้อนอีเมลผู้ใช้ที่ต้องการ และคลิกปุ่ม:guilabel:Save
สร้างข้อมูลประจำตัว
The Client ID and the Client Secret are both needed to connect Google Calendar to NightPOS. This is the last step in the Google console. Begin by clicking Clients in the left menu. Then, click Create Credentials, and select OAuth client ID, Google will open a guide to create credentials.
Under , select Website application for the
Application Type field, and type My NightPOS Database for the Name.
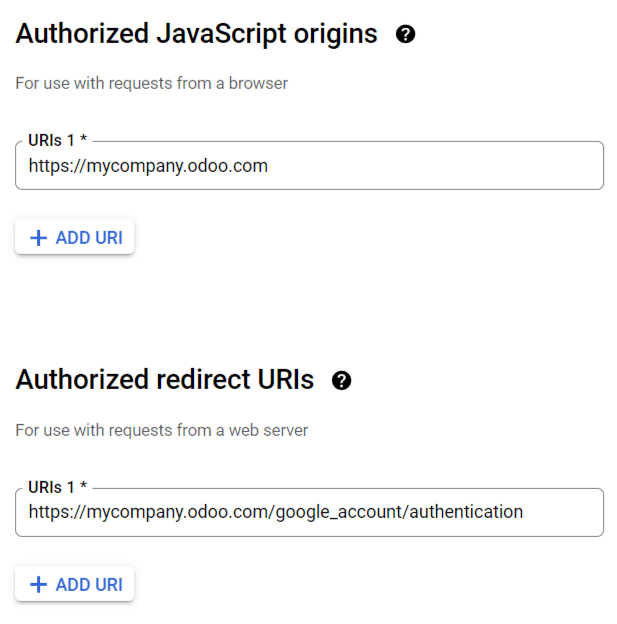
Under the Authorized JavaScript Origins section, click + Add URI and type the company's NightPOS full URL address.
Important
When entering the Authorized JavaScript Origins, the exact URL of the NightPOS database must be used.
If the database is accessible through both an .nightpos.com subdomain and a custom domain, the
custom domain configured as the primary domain should be used. The .nightpos.com subdomain may not
work correctly in all cases and can result in authentication errors.
Under the Authorized redirect URIs section, click + Add URI and type the company's NightPOS URL address followed by
/google_account/authentication. Finally, click Create.
:guilabel:`Client ID`และ:guilabel:`Client Secret`จะปรากฏขึ้น ให้บันทึกไว้ในที่ปลอดภัย
Setup in NightPOS
Once the Client ID and the Client Secret are located, open the NightPOS database and go to to find the Google Calendar feature. Tick the checkbox labeled Google Calendar.
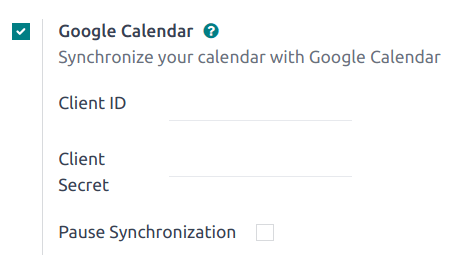
ถัดไป ให้คัดลอกและวาง Client ID และ Client Secret จากหน้าข้อมูลรับรอง Google Calendar API ลงในฟิลด์ที่เกี่ยวข้องด้านล่างช่องทำเครื่องหมาย:guilabel:Google Calendar จากนั้นคลิก:guilabel:Save
Note
ทำเครื่องหมายในช่อง:guilabel:`Pause Synchronization`เพื่อหยุดการอัปเดตอีเวนต์ชั่วคราว วิธีนี้ช่วยให้สามารถทดสอบและแก้ไขปัญหาได้โดยไม่ต้องลบข้อมูลรับรองหรือถอนการติดตั้งการซิงโครไนซ์ หากต้องการดำเนินการซิงค์ต่อ ให้ล้างช่องทำเครื่องหมายและบันทึก
Sync calendar in NightPOS
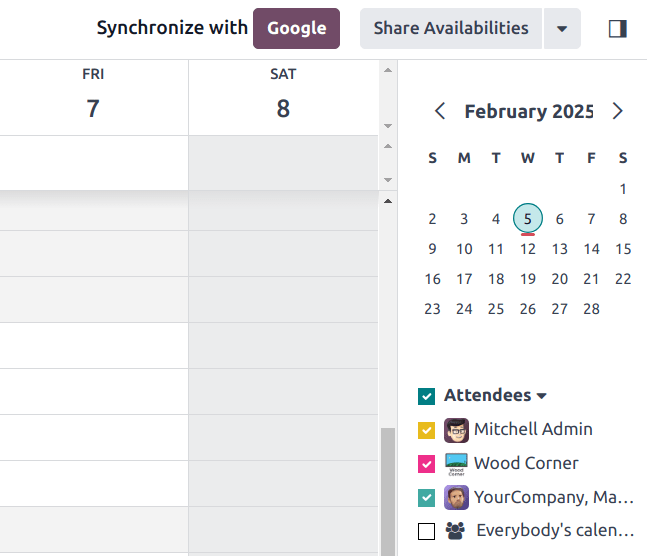
Finally, open the app in NightPOS and click the Google sync button to sync Google Calendar with NightPOS.
Note
When syncing Google Calendar with NightPOS for the first time, the page will redirect to the Google Account. From there, select the Email Account that should have access, then select Continue (should the app be unverified), and finally select Continue (to give permission for the transfer of data).

Now, NightPOS Calendar is successfully synced with Google Calendar!
Warning
NightPOS highly recommends testing the Google calendar synchronization on a test database and a test email address (that is not used for any other purpose) before attempting to sync the desired Google Calendar with the user's production database.
Once a user synchronizes their Google calendar with the NightPOS calendar:
Creating an event in NightPOS causes Google to send an invitation to all event attendees.
Deleting an event in NightPOS causes Google to send a cancellation to all event attendees.
การเพิ่มผู้ติดต่อในอีเวนต์ทำให้ Google ส่งคำเชิญไปยังผู้เข้าร่วมอีเวนต์ทั้งหมด
การลบผู้ติดต่อออกจากอีเวนต์ทำให้ Google ส่งการยกเลิกไปยังผู้เข้าร่วมอีเวนต์ทั้งหมด
สามารถสร้างอีเวนต์ใน Google Calendar โดยไม่ส่งการแจ้งเตือนได้โดยการเลือก Don't Send เมื่อได้รับแจ้งให้ส่งอีเมลคำเชิญ
แก้ไขปัญหาการซิงค์
There may be times when the Google Calendar account does not sync correctly with NightPOS. Sync issues can be seen in the database logs.
ในกรณีเหล่านี้ บัญชีต้องได้รับการแก้ไขปัญหา สามารถรีเซ็ตได้โดยใช้ปุ่ม Reset Account ซึ่งสามารถเข้าถึงได้โดยไปที่ จากนั้น เลือกผู้ใช้เพื่อแก้ไขปฏิทิน และคลิกแท็บ ปฏิทิน
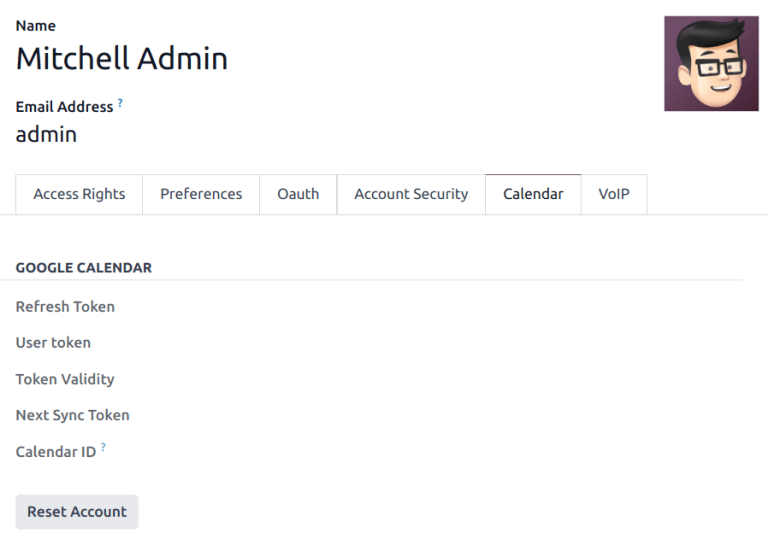
จากนั้น คลิก Reset Account ภายใต้ปฏิทินที่ถูกต้อง
ตัวเลือกการรีเซ็ต
The following reset options are available for troubleshooting Google calendar sync with NightPOS:
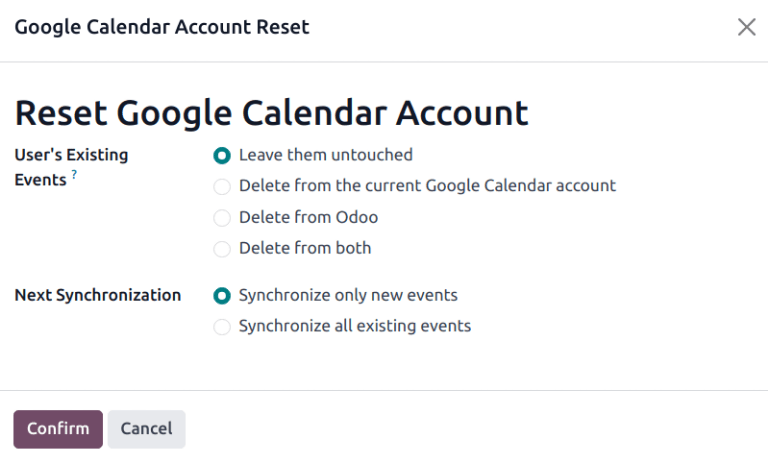
อีเวนต์ที่มีอยู่ของผู้ใช้:
ปล่อยไว้ตามเดิม: ไม่มีการเปลี่ยนแปลงอีเวนต์
ลบจากบัญชี Google Calendar ปัจจุบัน: ลบอีเวนต์จาก Google Calendar
Delete from NightPOS: delete the events from the NightPOS calendar.
Delete from both: delete the events from both Google Calendar and NightPOS calendar.
การซิงค์ครั้งถัดไป:
Synchronize only new events: sync new events on Google Calendar and/or NightPOS calendar.
Synchronize all existing events: sync all events on Google Calendar and/or NightPOS calendar.
คลิก ยืนยัน หลังจากทำการเลือกเพื่อแก้ไขอีเวนต์ของผู้ใช้และการซิงโครไนซ์ปฏิทิน
Google OAuth FAQ
At times there can be configuration errors that occur, and troubleshooting is needed to resolve the issue. Below are the most common errors that may occur when configuring the Google Calendar for use with NightPOS.
สถานะการเผยแพร่แบบโปรดักชันเทียบกับการทดสอบ
การเลือก โปรดักชัน เป็น สถานะการเผยแพร่ (แทนที่จะเป็น การทดสอบ) จะแสดงข้อความเตือนดังต่อไปนี้:
OAuth จำกัดการเข้าสู่ระบบขอบเขตที่ละเอียดอ่อน 100 รายการจนกว่าหน้าจอความยินยอม OAuth จะได้รับการยืนยัน ซึ่งอาจต้องใช้กระบวนการยืนยันที่ใช้เวลาหลายวัน
เพื่อแก้ไขคำเตือนนี้ ไปที่ Google API Platform หาก สถานะการเผยแพร่ เป็น ในโปรดักชัน ให้คลิก กลับไปทดสอบ เพื่อแก้ไขปัญหา
ไม่มีการเพิ่มผู้ใช้ทดสอบ
หากไม่มีการเพิ่มผู้ใช้ทดสอบลงใน หน้าจอความยินยอม OAuth จะมี ข้อผิดพลาด 403: access_denied ปรากฏขึ้น
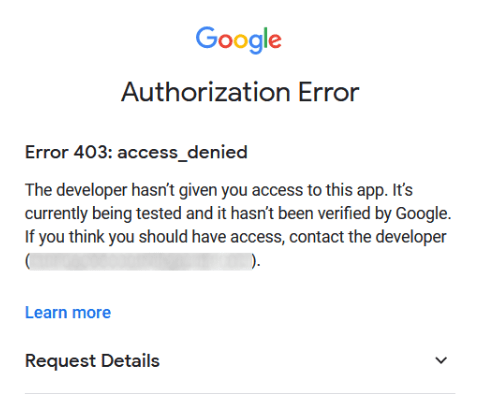
To correct this error, return to the OAuth consent screen, under APIs & Services, and add test users to the app. Add the email to be configured in NightPOS.
ประเภทแอปพลิเคชัน
เมื่อสร้างข้อมูลประจำตัว (OAuth Client ID และ Client Secret) หากเลือก แอปเดสก์ท็อป สำหรับ ประเภทแอปพลิเคชัน จะปรากฏ ข้อผิดพลาดในการให้สิทธิ์ (ข้อผิดพลาด 400:redirect_uri_mismatch)
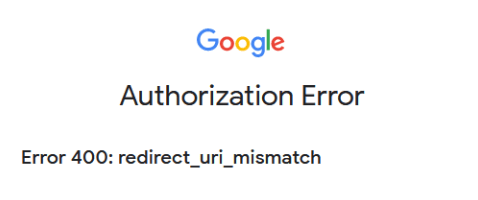
เพื่อแก้ไขข้อผิดพลาดนี้ ให้ลบข้อมูลประจำตัวที่มีอยู่ และสร้างข้อมูลประจำตัวใหม่ โดยเลือก เว็บแอปพลิเคชัน สำหรับ ประเภทแอปพลิเคชัน
Then, under Authorized redirect URIs, click ADD URI, and type:
https://yourdbname.nightpos.com/google_account/authentication in the field, being sure to replace
yourdbname in the URL with the real NightPOS database name.
Tip
Ensure that the domain (used in the URI:
https://yourdbname.nightpos.com/google_account/authentication) is the exact same domain as
configured in the web.base.url system parameter.
เข้าถึง web.base.url โดยเปิดใช้งาน โหมดนักพัฒนา และไปที่